April 29, 2011

~FrugalB How To~

First I want to clarify that being Frugal by no means is a nice way to say being Cheap. Frugal is defined as, Economical in use or expenditure; prudently saving or sparing; not wasteful: Think cost per wear or value of consumption (food). Cheap is defined as,costing very little; relatively low in price; inexpensive: a cheap dress.

See two very different things


Any one can be Frugal and at any price point. Being Frugal in my world is obtaining the things we want and need for drastically less than retail. I want to share how I do that.


~Know what is on hand~


Before I purchase anything and I mean anything I know what we have. That goes for any and everything (yes I am saying it again). This is imperative so that you are not over purchasing. Over purchasing defeats the purpose of being frugal. Example:


You find a pair of Nike's for 75% off (Score) and they have multiple sizes. You purchase 2 pair but only one of your kids need shoes. Now you have spent that 25% and the 2nd pair of shoes don't get worn. They are now getting sold at a garage sale for 10% (Maybe less) of what you paid. The value has been lost because you were unable to use them. You lost money, that could have been spent somewhere else.
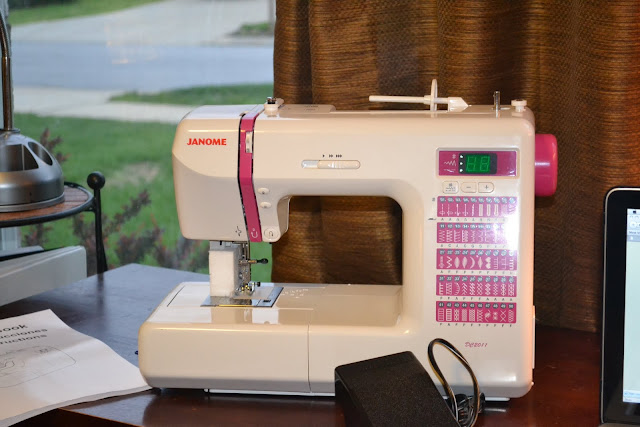

~Learn to Sew~

I once read that if you can drive you can sew, pretty much. Sewing opens you up to so many more possibilities. The ability to make simple alterations increases the longevity of clothing. Refashioning, think jeans to shorts, Shirt to dress, pants to back pack. Not to mention simple tailoring, the ability to take out a hem and lengthen a pant (I am tall) or hem a pant, affords you more purchasing power.


~Trash ?~

With your new sewing skills and a bit of crafting what you once thought was trash becomes new treasure. Talk about Green Living!


~Hunting~

We all know time is the only non-renewable resource, but to get the deals, especially if you are not into refashioning, you must hunt. I mean hunt like you have no food and need to feed your babies. I know who has a sale when and where, what time of year past season items are going on sale. I make friends, and i mean friends with the employees at my favorite spots. And I have been known to stalk Craigslist and my favorite stores. Now you may get lucky and happen upon a great deal. But live this way it has to become a lifestyle.


~Perspective~

Now that you are crafting, sewing, and not over buying, your view of things will change. Most everything is fabric to me. A sheet can easily become a quilt (once I learn how). The extra funds we save is now a fab Disney Vacation (yes we really did that). And you become a steward of your money and time.

I truly enjoy getting something for less. Especially if it is something we really need. My husband and I have really gotten accustom to living below our means (Not typical Americans). We enjoy the freedom if affords us. I hope this helps.

April 26, 2011

~ My 1st Tutorial - T-Shirt Dress ~

I recently wondered into Goodwill looking for some things to UpCycle for my youngest son and ran across a t-shirt. It was brand new and only $1. I snagged it thinking I could make undies or a t-shirt from it for my little man.

Well, I got the shirt home and laid it out on the table and began to look at it again, the shirt said to me "I am a dress". I promise it spoke. I love my boys, 3 of them to be exact, but my daughter has been quite the little inspiration for soo much crafting. So often she gets the fruits of my labor. And this time was no different.

I am going to share with you this easy peasy process. This my first tutorial so bear with me.

Supplies ~
dress that fits your little one
T-shirt - I used an adult small
Sissors
Sewing machine
thread

Cut shirt right under the arm holes.

I forgot to photograph the cutting process but this is similar. Place your dress that you are using for a patter at the neck line of the shirt. I used the tag and all.

Proceed with Basting the bottom half of the shirt. This will be the skirt


I cut the end of the arm holes for the new arm hole of the dress and attached


worked like a charm


Now attached the top to the bottom (not like this), but so it comes out right.


I then cut strips of for a ruffle

Baste your strips

Pull to create the ruffle and attach.


Your Done!

This was FUN, quick and easy. Very little sewing because you will use the hem from the shirt arms and kneck. Embellish till your little heart desires.

April 25, 2011

~ House of Fifty ~

BWS tips button


It is always nice to see something grow, mature, and change. I have always enjoyed the seasons changing. I find it fun to figure out what to wear, and even more fun to see what others will wear (weather confusion is always fun to watch). The Blogging world is no different, you watch your favorite blogs grow, mature and change. The growth is always fun, and the anticipation is invigorating. There are times when some of your favorites decide to sign off and pursue other creative venture and outlets. Then there are those who grow beyond what you ever imagined.


Janell Beals, the blogger behind Isabella & Max Rooms, has launched HOUSE Of FIFTY. Today marks the inaugural issue and it is packed full of ideas, blogs to watch, and a bit of fashion. I look forward to watching this extension of Janell's blog grow and blossom.


I already have some ideas I will be using in our home.


April 21, 2011

I get the privliage of visiting Mom and Dad over the long weekend and I am going to get the chance to help my mom gussy up her Craft/Sewing studio and tackle a few other small projects.

I hope you too enjoy the weekend and have a Happy Easter!!!

April 20, 2011

~ Reduce Reuse Recycle ~

I have been having a blast with my new Janome 2011. This machine sews with ease and presicion. I recommend her to anyone, especially a beginner, what a great experience so far.


Last night I took her for another spin and made a sweater for Symone, well kinda. It has been cool in the mornings and I needed something on her arms, a very lightweight sweater. So of course I started thinking of what I could use.


Earlier this week I saw the tutorial over at Kojodesigns << (you will fall in love with this blog) , where they took a onesie and turned it inot a ruffled sweater.


Tutorial for this at Kojodesigns


So I did a variation as Symone is a bit big for the onesie now.


Started with one of her Gently used long sleeved shirts

Getting ready to cut striaght down the middle


Used for embelishment


Then it HIT me, Use a decoritavie stitch

This foot glides over the stitches


I am just giddy about this because she isn't going to be able to fit this next fall.


It only took me 15 Min and was 100% free!!!!


I have entered this in the CSI contest, Reduce, Reuse, Recycle Challenge! Click the link below to check them out

Visit thecsiproject.com

April 18, 2011

~ Sew Fun, Sew Easy, with the right Tools ~

Ok, I come from a long line of seamstress. My grandmother owned and operated a alteration shop in Warner Robins GA for over 30 years. She had 8 children and all but one of them know how to sew (you always have a rebel in the family), and sew well.

My mother did her best to try to "domesticate" me, but I ran. I wanted nothing to do with it. She wrangled me a time or two with the threat of being an "old maid" and I picked up a few things. But for the most part I attempted to stay away. Well just like she said, I wish I had sat for those lessons, I would be so much further. However I will say I am having a blast learning on my terms.

My husband, bless his heart, purchased a beginners Singer sewing machine for me about 5 years ago. I was so busy with work that I can count on my hands how many times I attempted to use it for 3 years. I always found it difficult and chalked it up to my lack of sewing skills. I had my mother attempting to educate me over the phone. I am sure she was perplexed at how much I had forgotten.

I dusted it off 2 years ago when I stayed home with our kids (2 at the time) and I wanted new curtains. I figured I could do it, and I did, but boy was it a chore. Every time I stopped sewing I had to re-thread my bobbin. I would get tension problems in the middle of a project. Basically it was an event to sew anything. I kept thinking I just did not know my machine.

When my mom sewed on my machine she had a lot of the same issues but she could correct them with ease. But even she said that it was annoying. So for the last 6 months I have been machine searching, yearning and drooling. I figure if I was going to do this I needed to do this right and invest in myself and my family.

My initial thought as Frugal B. was to have my sewing machine repaired. I took it to a local store, that of course sells machines, to get it looked at. I called first so I knew there was a $25 diagnostic fee. I dropped it off and couldn't help looking at the shiny new machines and asking questions. The machines ranged in price from $299 to $6,000, whooooooo nelly. I still entertained the salesmen/repair man and gave him my sewing resume. He encouraged me to look into the Janome 2011. Their price was $699 on sale for $599, pricey.

After extensive researched we found that the Janome was the best fit for my skill level and more importantly my pocketbook. Online the same machine was selling for $499 with free shipping, $100 savings. We also found another Janome dealer (30 miles away) that had the $499 with a trade in (any brand machine) and free lessons. The store I had gone to the promotion was no tax in the month of April, along with free sewing lessons for 1 year. I was torn, there was value in both options. So we did what we always do and just asked for them to match the price. Believe it or not they said yes but no lessons.

My husband went to pick up the machine with the CASH (more on that later). He was gone for about 30 minutes and I received a call from the store trainer. Calling to set up my one on one lessons. I was so confused, we weren't supposed to get the lessons. Well I told her that and she said that she was told to call me. That they wanted to offer them to me still (yay)!!!


Meet Abigail


Came with a hard case


50 stitches and an automatic button hole maker


I set up my introduction to the Janome 2011 for Monday, yes yesterday. But of course I couldn't wait. My husband brought her (yes her not it) Sunday at about 1pm and I had this done before 6pm (see below).It would have taken me days to do this on my old Singer, I am over joyed with our purchase. But even happier to know that it wasn't me, it was a machine.

April 17, 2011

~ The Space Where I Create ~

Finding a place to craft, sew, DIY, has been a bit difficult. While we have nooks and crannies that are not being used in our home I had dreams of having more. I didn't just want a Craft Corner, I wanted room to spread out, a place to display my creations, and still be in the mix with the rest of the family. With that criteria I had a few options.

Our loft, kid central in our house, it had room for me but I would need to be confined and be sure to put things up high. I considered the closet of my husbands office, it had a closed door and I could spread out after business hours, but it was closed off. I could have also used our room, it's huge, but I want that to be just our space. I really enjoy sewing but to see it before bed is a bit much for me.

Then it hit me, why not use the formal living room, no one else is. It is open to the dining room, so there is a table that I could craft on. It is open to the the family room and kitchen, and it looks out over the front yard, where the boys play basketball. It met all of my arbitrary well thought out needs. Since the space is open to the rest of the house and the first room seen when you enter our home I did have to hold back my desire to girly up the space. So this is what I came up with, it works for me so far.


April 15, 2011

~Frugal B. Defined~


I was a blog lurker (a good one too) before I began blogging, as I am sure many of other bloggers were. I could tell you what blog to go to for what without much thought. Just as some plan to watch a television show, I planned blog hopping. Which blog to got to daily, which blogs posted daily, bi-weekly or another schedule and who I would go to if I just needed some instructions.


During this time my husband was urging me to find my own blogging voice. He would say, "that great deal we found the other day, would be a good post". He would encourage me to take pictures of the things we were doing so that I could be inspired to share. While I wanted to take the plunge I was nervous of not having a voice, or my voice being lost. I had fears that no one would follow me, that I would be regurgitating what was already said.


Then I started to think about how many of my friends and family call us to find out how we did this or that, where they should look for that thing or the other, and the biggest question we got was "how much did YOU pay for that"? So I started feeling that this information was not just for others to view (people I don't know), but for me and the people I hold near and dear. If no one else followed, read, or watched, does it even matter.


I got down to business and decided that I needed to share our Frugal Finds, Frugal Saving, and Frugal Living.


~Frugal B. DEFINED~

~ A blog where you can get Frugal information no matter your budget


~ A blog that shows you can have what you always wanted, just CHEAPER


~ A blog that increases your knowledge


~ A blog that pushes you beyond your self imposed limits


~ A blog where you gain understanding of how much your time is worth


Linking to

~Temporary Fix - Now Permanent Solution~


When we bought our home 6 years ago I really wanted a kitchen that had all the bells and whistles. But as we began to prioritize our needs vs our wants that desire steadily moved down the list. At the time we purchased our home it was just the 3 of us, my husband, myself and Kamden. Now we both wanted a large family, hence the 2700 sq ft home with just us, but all we could conceive at the time was the need for space (neither of us came from large families we did not know any better). So the home with more space won out over the homes with more bells and whistles.

We began to tackle the kitchen 2 years ago. We started with the floor. We took out the linoleum and replaced it with tile. That was a J-O-B. It was such a job that we finished it and did not touch the kitchen again for 2 years. During that time we were pricing cabinets. Yes, we chose the builder grade, come with your house for "free"cabinets. With the idea that we were going to change them through an independent dealer, because we did not like the choices our builder had. Well we were in for a nice little surprise to find that cabinets were PRICEY!! So on to plan B, we were going to find some cabinets avoidably and put them in up by ourselves.


I dreamed of moving the cabinets we have now to the garage and the laundry room and getting deluxe black cabinets with pull out drawers and one touch closing. So we scoured Craigslist, looked for closeouts, all while planning our new layout. We found some great deals but again we were shocked with the price of granite counter tops (new cabinets meant we had to get new countertops), shoot the price of any counter tops. Now we are all for getting good stuff but it takes some time to save, plan, and search out the best deal for things. So I kept praying for a nice set of cabinets and a good deal on counter tops to come along at the same time.


Well, I got tired of waiting and I proposed painting the cabinets to the Hubby. Most times I have to talk him into things, this time was no different. I scoured blog land to find good examples of painted cabinets (he needed proof that it would work). I sent hime here, here, and here.Hubby got right on board with the plan to paint the cabinets. With the understanding that this was a temporary fix, to make me happy, until we could afford "the real thing". The only part he was not OK with was me painting them. He said that with 4 kids that the length of time it would take to do this right was going to impede on our family a bit much. While I strongly disagreed, I began pricing professional painters.


I started getting prices and first thought I was just reaching out to the wrong people but $3,000 was the cheapest I could find. Well Mr. Frugal B. was not down with that. So I gave up on finding somebody and started working on wearing down Hubby, to get this done I was going to need to roll up my sleeves and get to painting. I have painted our entire home and I think I do a pretty good job, but he was still leery. So I moved on to the next project, which was finding a finish carpenter to put in some box molding. I found a Carpenter on Craigslist that had a wonderful website with referrals and all, so I had him come out. So as he was measuring the wall for the box molding (yeah I am doing that myself), I asked him if he knew anyone that painted cabinets. Well, he said he could do it, asked me what I was looking for. I told him BLACK, and waited for shock. He said he had just completed a similar color with distressing for someone close and that he could give me their information so I could talk to them (he was super professional). So I waited for the price, which came the same evening (crazy right). He priced it at $600!!!!


So I was faced with another dilemma, how was I going to explain to my husband that I found a carpenter on Craigslist (of all places) that has given me a quote to paint our cabinets (spraying them) for less than a 1/3rd of other quotes, and have him take me seriously? Well, I talked him into it and this is what we got!


Sprayed Black Cabinets with a 4inch crown and a 1x4 turned lateral on the bottom. We love it!


~I am now in LOVE with the Temporary Fix ~